Glitter Heart Sign

Supplies you will need:
* 1 Standard Board (1×6 – 10″) – I happened to find boards that were naturally discolored, and I loved the colors so much that I chose not to stain them. If you would like to stain your wood, Minwax is wonderful (I love Weathered Oak for a Restoration Hardware feel).
*A saw, unless you have the store you purchase your wood from cut it for you. Some places such as Lowe’s are willing to do this if you ask them!
*Screws (1 1/4″ – #8)
*Nail gun
*1 bottle of Matte Mod Podge
*At least 1, 1 oz. tube of iridescent glitter (I used the Martha Stewart line from Michael’s).
*A paint brush
*If desired, a large heart to trace (I found mine at Walmart).
*A marker to trace your heart (I used a chalkboard marker so that it would not show through the white glitter).
Total project cost: $20.88.
**I had everything except for the wood, glitter, felt heart and Mod Podge.
 I started by having my husband cut my board (I am banned from the saw – nothing good can come of it!) into four 16 1/4″ long pieces (you will have a bit left, which will be used later on in the project).
 Next, we used a drill to make holes where each of the screws needed to go in order to connect the pieces of wood. You could opt to used wood glue rather than screws to secure the boards together if you don’t have access to these tools.

My husband then used the remaining wood that we had, and cut two pieces to place over the exposed holes. Each of these pieces were cut to 1 3/4″ wide, by 16″ long. We then used a nail gun to tack them down. If you used wood glue rather than screws, you will definitely need to still use support beams on the back to ensure your sign stays together.
I then took my felt heart, along with a permanent chalkboard marker, and traced the heart onto the wood. I just eyeballed this part and hoped for the best. You could measure though if you feel more comfortable.
Next, I took my paint brush and matte Mod Podge and filled in my heart very carefully so as to stay in the lines. After my heart was thoroughly covered, I generously sprinkled my glitter as evenly as possible over the heart.
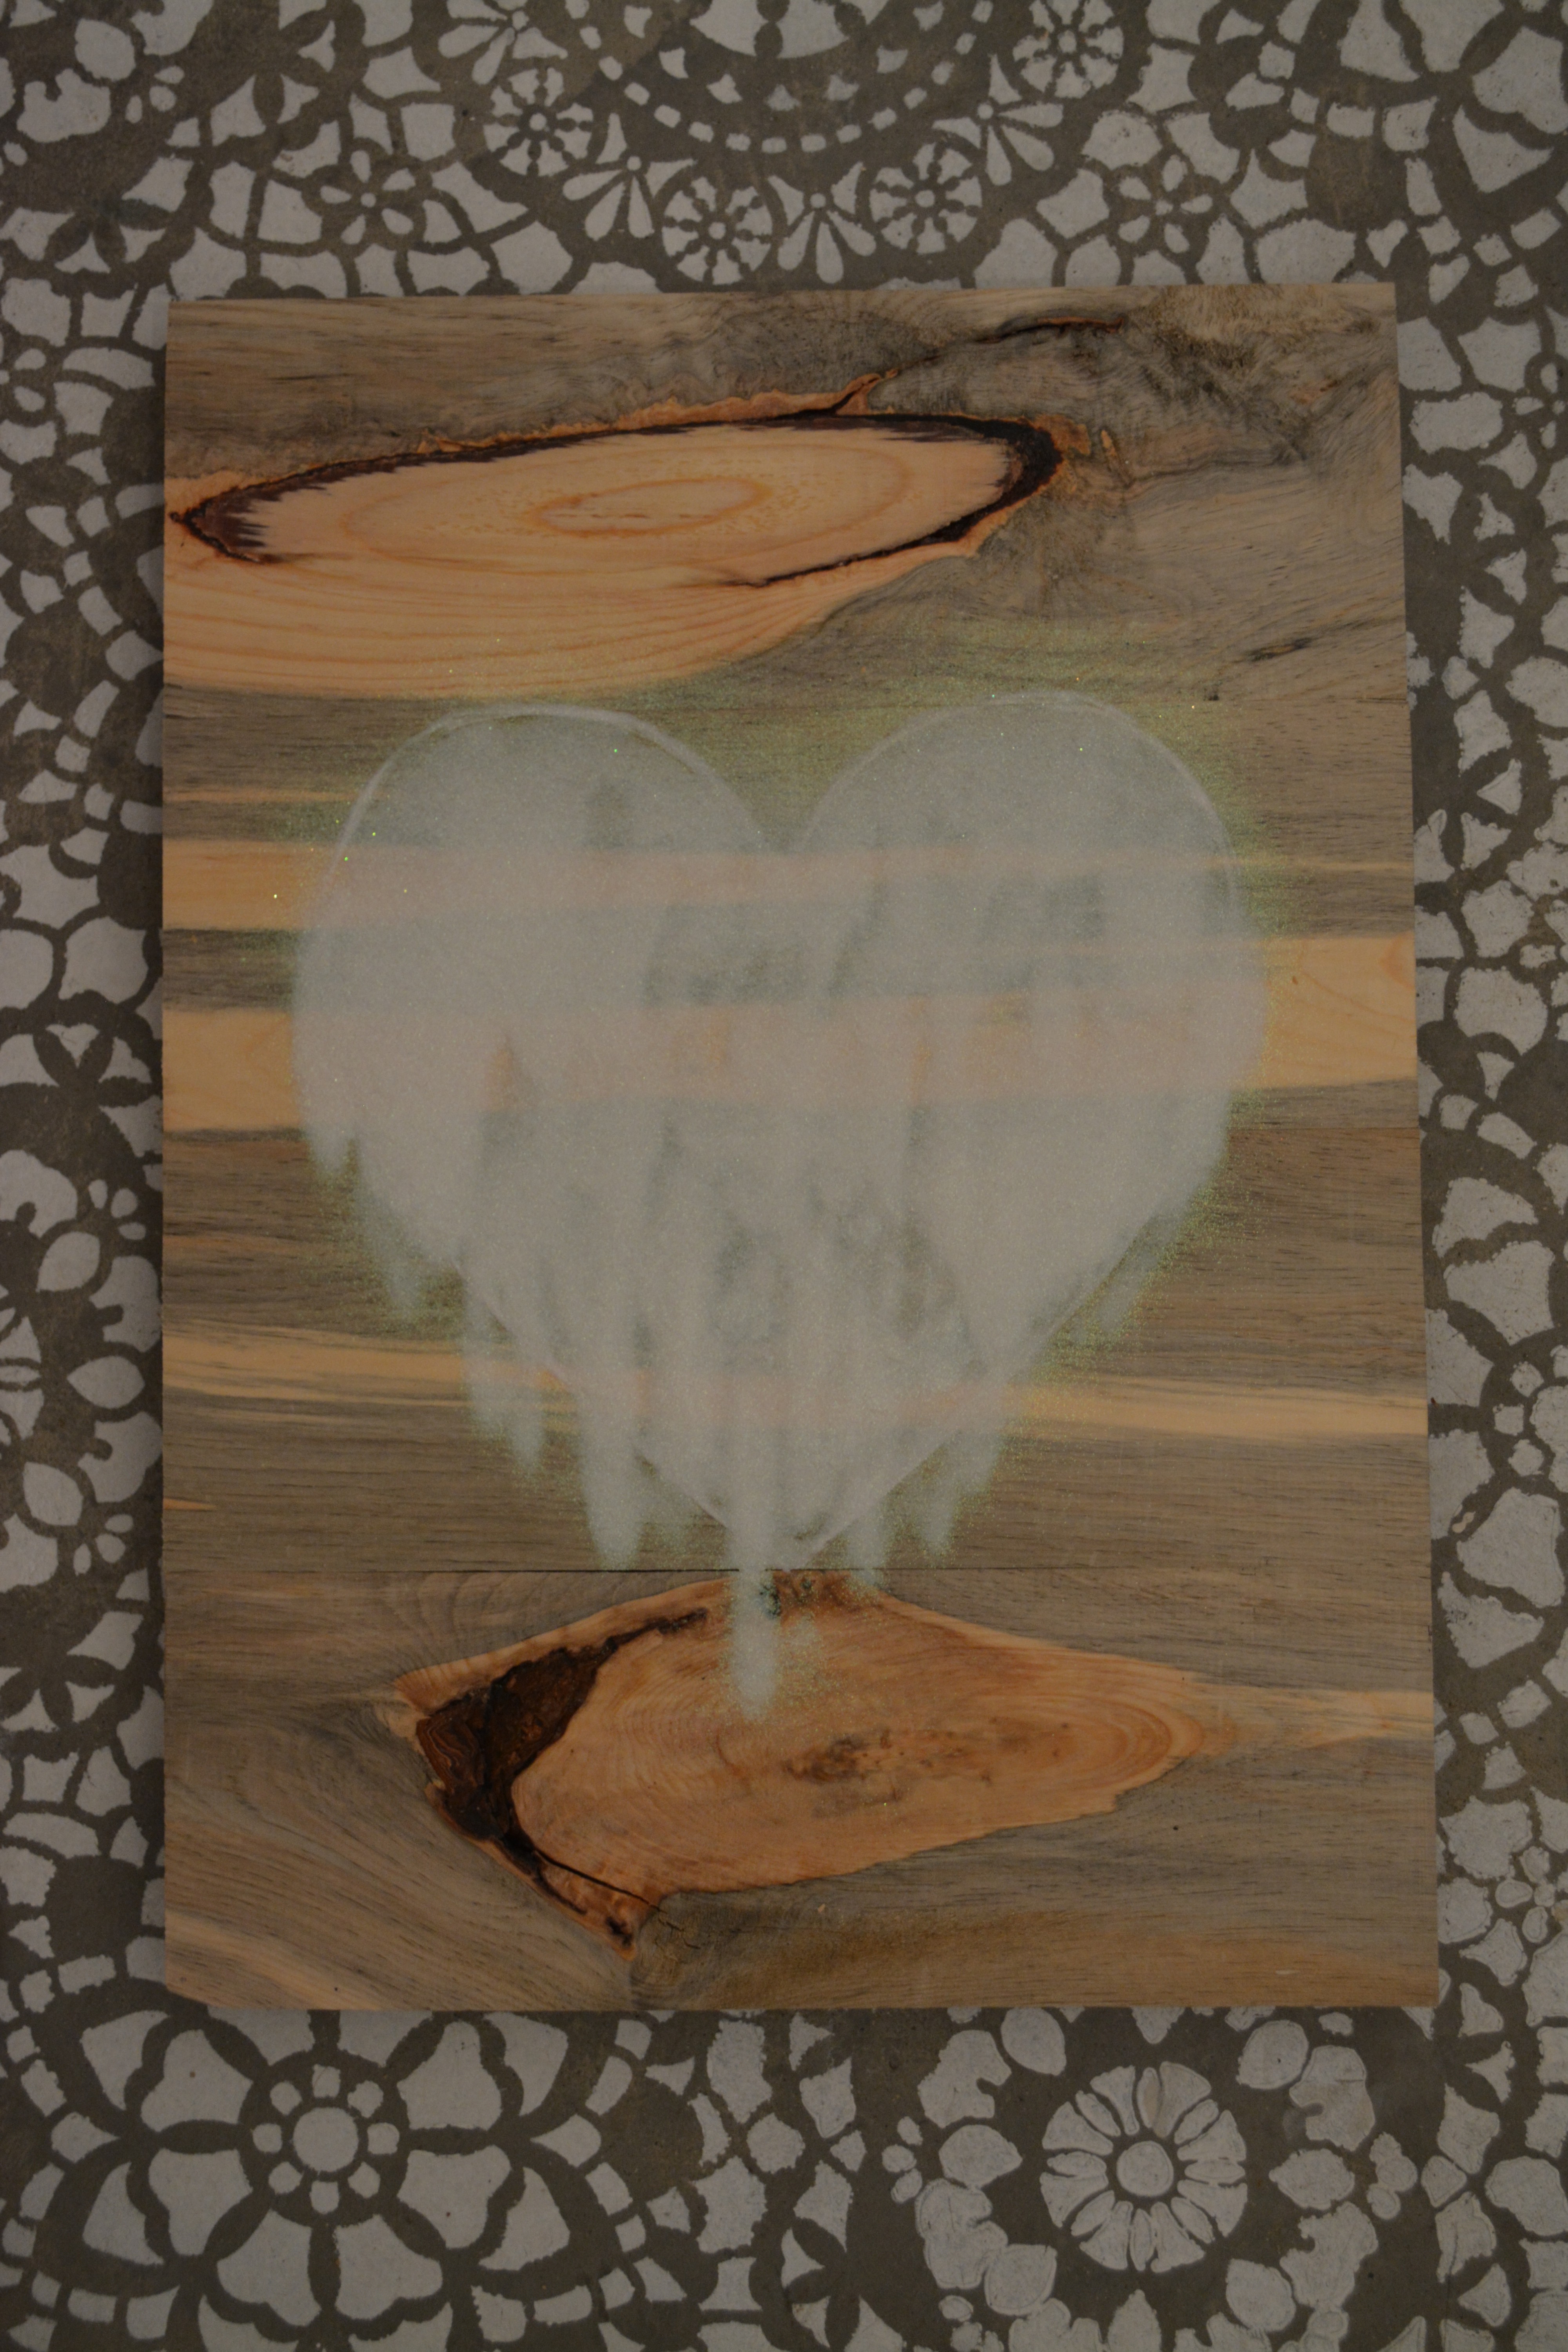
I let it dry for a bit, and then I repeated this step two more times. I then gave it one last top coat with the Mod Podge in order to seal all of the glitter. Make sure that you keep your sign laying flat so that the glitter/Mod Podge does not drip.
I ended up putting hooks on the back so that I can hang my sign if I want to, but that is optional. I love these signs because they are easy to make, and the possibilities are endless. I can’t wait to incorporate this one into my Valentine’s Day decor!

Pingback: Valentine’s Day Home Tour | East Egg Style